Hello everyone,
I'm just here to share my newest love...MY PRECIOUS!! My newest stamping tool, The MISTI... It is nothing related to misting, just that the word MISTI stands for Most Incredible Stamping Tool Invented. And I can promise you, it is all that and more!
Here is my short review on MISTI...I have been using it for almost 4 weeks now. I simply love it. I am so planning to sell off my Fiskars Stamp Press. (If anyone is interested, please send me an email)
What it does?
Its a stamping placement tool. Its design is such that you can stamp again and again in the same spot without getting ghost images.
Its hinge lid ensures the perfect placement every time. It will be confusing if you have never seen it in action. So hop over to My Sweet petunia's Channel and check out this video..and most of her other videos.
Do you need it?
If you are a serious stamper...and I mean, you make more cards stamping than using dies and flowers and all that jazz, then yes, run and get it. You will love it.
If you like stamping and want to get serious about it, start saving for it.
If you are a crafter who only stamps sentiments on cards, or random stamping on your Scrapbook pages or only makes scrapbooks, don't invest in this right away(and this is my opinion specifically for a beginner stamper and crafter)
Simply because the cost factor is such that you cannot use it instead of your acrylic block. It costs 50$ plus the shipping and plus the customs. But if you have the means, then don't hesitate.
Simply put, it is more of a stamping tool which gives you perfect placement, perfect inking and if you don't get a clear impression the first time, you can re-ink and re-stamp in the exact same spot without any problems.You can stamp on your die cuts perfectly and you can make multiples of a card in a jiffy!
If you break down and get it, don't blame me!! :P
What all do you need with it?
For sure you need the magnets. And I recommend at least 2. I use 4, but then I am OCD about lining papers. You can buy magnets from locally... you need to get the size 20mmx2mm which is what I use. I brought them off Ebay long before my MISTI arrived.
Do not get the iron or ceramic magnets..they will stain your papers. You need to get Neodymium magnets or magnets that are coated with nickel.
Buying the spray and grid papers is optional...and I don't have either of those. I print out my own grid papers from free downloads on the internet.
And I use plain water and microfiber cloth to clean my acrylic lid.
Being the crazy person I am, I would also recommend get a cover for it. Buy any tablet cover that is around 11 inches x8.5 inches (Apple ipad Air covers seem to fit well)
It will hold your MISTI and make sure the acrylic doesn't break.
There are some other things that I am looking into, that is an addition to the MISTI, and as soon I find that they are good enough, I will update you all!
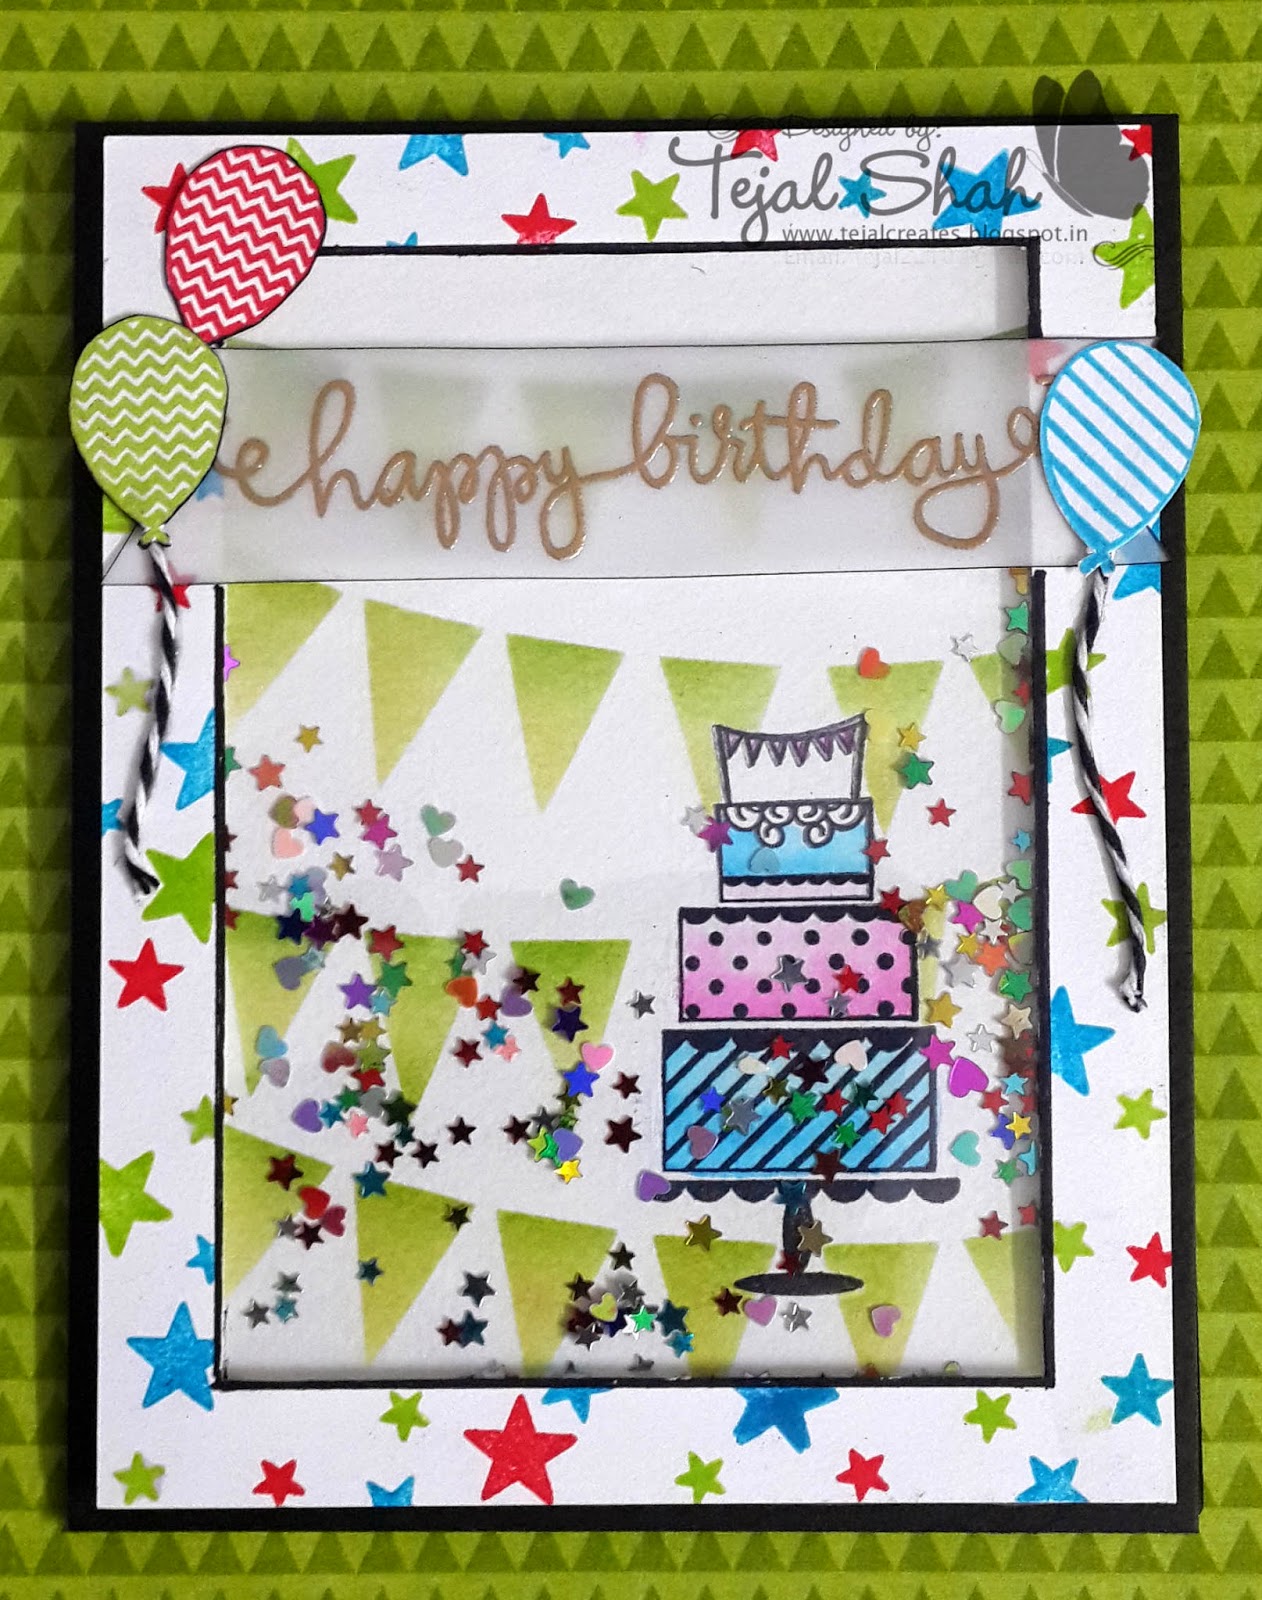
Here is my card that I made with this border stamp...when I was just testing out my new tool.
The image is super sized so that you can see how perfectly I was able to line up the stamps.
And most of the colors, the orange, the yellows and the blue (I hate that blue, never stamps well..I stamped it 3 times here) are all stamped twice and some more than twice.
Because of the MISTI, I didn't have to worry about lining it up. I knew it would stamp exactly the same place!

I used 9 inks, all of then Ranger Dye inks...except the 4th from the bottom which is Memento Dandelion ink. Finished it off with a sentiment from Winnie and Walter and some gems.
If you still have doubts, shoot me a comment or an email.
Coming in my next post, how to make your ink-swatches, or rather, how I made my ink swatches!

I'm just here to share my newest love...MY PRECIOUS!! My newest stamping tool, The MISTI... It is nothing related to misting, just that the word MISTI stands for Most Incredible Stamping Tool Invented. And I can promise you, it is all that and more!
Here is my short review on MISTI...I have been using it for almost 4 weeks now. I simply love it. I am so planning to sell off my Fiskars Stamp Press. (If anyone is interested, please send me an email)
 |
| Photo courtesy - My Sweet Petunia |
What it does?
Its a stamping placement tool. Its design is such that you can stamp again and again in the same spot without getting ghost images.
Its hinge lid ensures the perfect placement every time. It will be confusing if you have never seen it in action. So hop over to My Sweet petunia's Channel and check out this video..and most of her other videos.
Do you need it?
If you are a serious stamper...and I mean, you make more cards stamping than using dies and flowers and all that jazz, then yes, run and get it. You will love it.
If you like stamping and want to get serious about it, start saving for it.
If you are a crafter who only stamps sentiments on cards, or random stamping on your Scrapbook pages or only makes scrapbooks, don't invest in this right away(and this is my opinion specifically for a beginner stamper and crafter)
Simply because the cost factor is such that you cannot use it instead of your acrylic block. It costs 50$ plus the shipping and plus the customs. But if you have the means, then don't hesitate.
Simply put, it is more of a stamping tool which gives you perfect placement, perfect inking and if you don't get a clear impression the first time, you can re-ink and re-stamp in the exact same spot without any problems.You can stamp on your die cuts perfectly and you can make multiples of a card in a jiffy!
If you break down and get it, don't blame me!! :P
What all do you need with it?
For sure you need the magnets. And I recommend at least 2. I use 4, but then I am OCD about lining papers. You can buy magnets from locally... you need to get the size 20mmx2mm which is what I use. I brought them off Ebay long before my MISTI arrived.
Do not get the iron or ceramic magnets..they will stain your papers. You need to get Neodymium magnets or magnets that are coated with nickel.
Buying the spray and grid papers is optional...and I don't have either of those. I print out my own grid papers from free downloads on the internet.
And I use plain water and microfiber cloth to clean my acrylic lid.
Being the crazy person I am, I would also recommend get a cover for it. Buy any tablet cover that is around 11 inches x8.5 inches (Apple ipad Air covers seem to fit well)
It will hold your MISTI and make sure the acrylic doesn't break.
There are some other things that I am looking into, that is an addition to the MISTI, and as soon I find that they are good enough, I will update you all!
Here is my card that I made with this border stamp...when I was just testing out my new tool.
The image is super sized so that you can see how perfectly I was able to line up the stamps.
And most of the colors, the orange, the yellows and the blue (I hate that blue, never stamps well..I stamped it 3 times here) are all stamped twice and some more than twice.
Because of the MISTI, I didn't have to worry about lining it up. I knew it would stamp exactly the same place!
I used 9 inks, all of then Ranger Dye inks...except the 4th from the bottom which is Memento Dandelion ink. Finished it off with a sentiment from Winnie and Walter and some gems.
If you still have doubts, shoot me a comment or an email.
Coming in my next post, how to make your ink-swatches, or rather, how I made my ink swatches!